In this section, we will create a new MVC framework web application using Visual Studio and understand the basic building blocks of the ASP.NET MVC Application.
Let us start to create our first application using ASP .NET MVC Framework.
Contents
Step -1 / Visual Studio
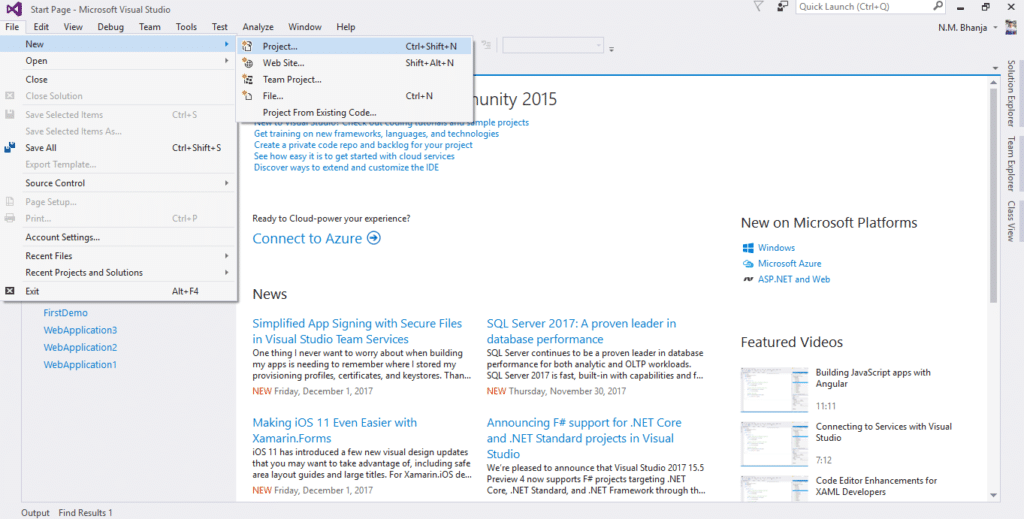
Open visual studio from all programs.
Step – 2 / Create Project
Select File –> New–> Project
A new project pop-up will open on your screen.
Choose web under Visual C# menu in Template categories.
Select “ASP .NET Web Application “
Change Project Name on the name field.
Change the project path as you wish.
Please find the below screenshot for your reference.
Click OK button.
Step – 3 / Setup MVC framework in Project
A new “New ASP.NET Project” popup will open. Select template type empty or MVC Checks the MVC checkbox under add folders and core reference. Please find the screenshot for your reference.
The above picture describes the folder structure of the MVC Project. It can visible under Solution Explorer.
Step – 4 / Create Model
Create a new class file in the model folder.
Here we are going to create a new student model “StudentModel.cs” in our MVC Application.
Please find the screenshot Fig – 3.5 for your reference.
StudentModel.cs :-
namespace FirstApplication.Models
{
    public class StudentModel
    {
        public int ID { get; set; }
        public string Name { get; set; }
    }
}
Now our model is ready to use.
Step -5 / Create Controller
Create a new controller in our Controller folder.
Here we are going to create a new Home controller “HomeController.cs” in our MVC Application.
Please find the screenshot Fig – 3.6, 3.7 & 3.8 for your reference.
HomeController.cs :-
using System.Collections.Generic;
using System.Web.Mvc;
using FirstApplication.Models;
namespace FirstApplication.Controllers
{
    public class HomeController : Controller
    {
        // GET: Home
        public ActionResult Index()
        {
            List< StudentModel> studentModel = new List<StudentModel>() {
                new StudentModel { ID=1, Name="Neil"},
                new StudentModel {ID=2, Name="Lipsa" }
            };
            return View(studentModel);
        }
    }
}
Step – 6 / Create View
This is our final step.
Create a new view in our View folder.
Here we are going to create a new Index view “Index.cshtml” under the Home folder in our MVC Application.
Creation of View:-
Right-click on the Index action name in the controller then select add view menu.
Please follow the below screenshot for the creation view in MVC Application.
Index.cshtml :-
@model IEnumerable<FirstApplication.Models.StudentModel>
<!DOCTYPE html>
<html>
<head>
    <meta name="viewport" content="width=device-width" />
    <title>Index</title>
</head>
<body>
       <table border="1">
        <tr>
            <th>
                @Html.DisplayNameFor(model => model.ID)
            </th>
            <th>@Html.DisplayNameFor(model => model.Name)</th>
        </tr>
    @foreach (var item in Model) {
        <tr>
            <td>
                @Html.DisplayFor(modelItem => item.ID)
            </td>
            <td>
                @Html.DisplayFor(modelItem => item.Name)
            </td>
        </tr>
    }
    </table>
</body>
</html>
The above code will generate automatically.
Step – 7 / Run MVC Framework Application
We are completed successfully our MVC application. We are going to run the application in Visual Studio. Press the f5 button. Now we will see the output of our MVC Application.