SQL Server Management Studio installation topic will provide knowledge about How to install SQL Server Management Studio (SSMS) in the local system ie windows operating system and also get an idea on How to connect SQL Server Management Studio(SSMS). Installing SSMS on windows OS because Windows OS commonly use in regular life, so here we are telling you to install SSMS in windows.
Pre-Requisites
Net Framework,1GB of recommended memory, and NTFS system.
Now We get the process to install SQL Server
Before proceeding to this session, Please read below topics
Introduction to Structured Query Language (SQL)
Object-Relational Database
Download SQL Server
Step – 1
Need to download SQL Server from the Microsoft website. Click here to download SQL Server
Step – 2
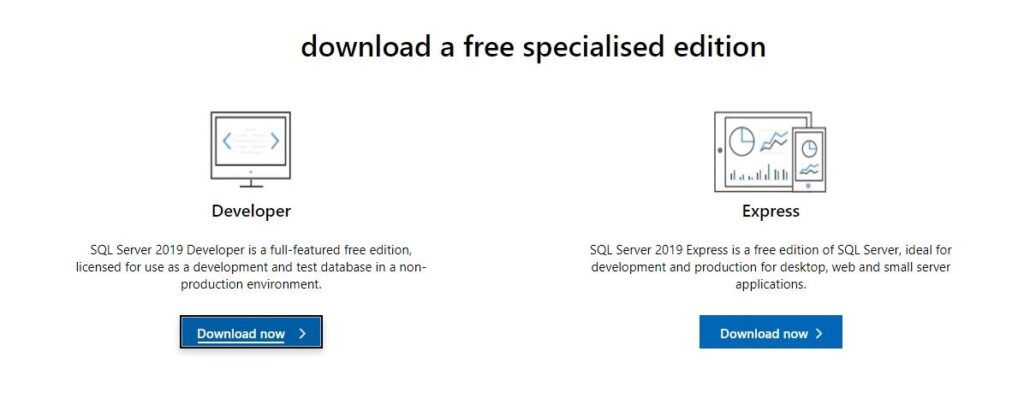
Microsoft provides two specialized free editions to work on MS SQL server
Developer:
It has all the features that MS SQL Server provides but we cannot use it in production. It only uses a learning point of view.
Express:
It is also a free version, but with a limited set of features with no business intelligence application.
In this case, Please choose the Developer edition for installation.
We will get the SQL2019-SSEI-Dev.exe installation file when we click on Download now button.
SQL Server Management Studio Installation / SQL Server Installation Process
Step – 1
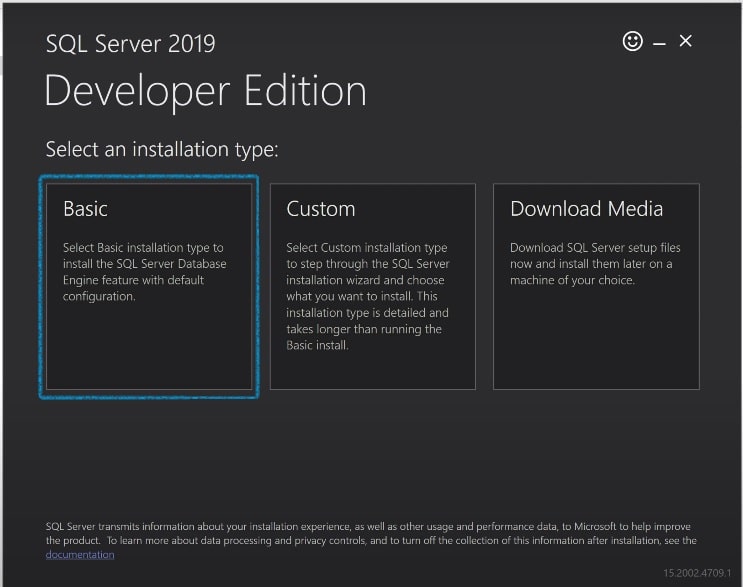
Double click on “SQLServer2017-SSEI-Dev.exe”.
The first screen (below screen) will display three options: Basic, Custom, and Download Media.
Select the basic version by clicking on the ‘Basic’ option, as it has all default configurations required to learn MS SQL.
Step – 2
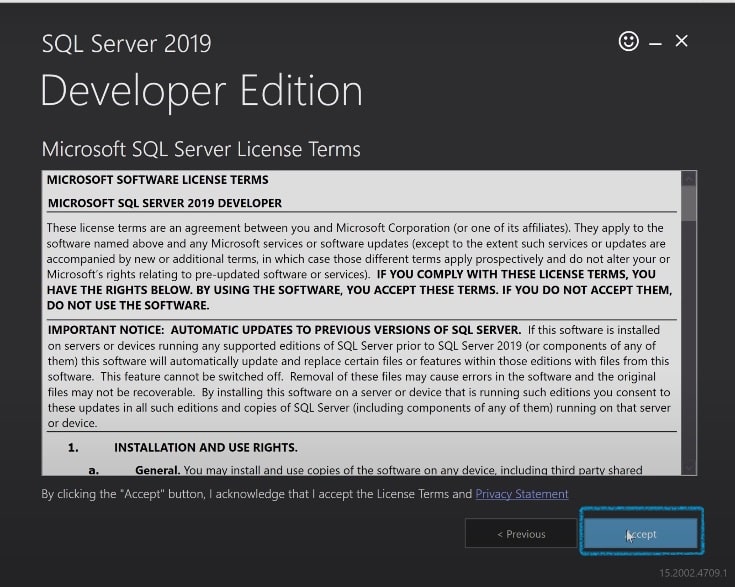
‘Microsoft Server License Terms’ screen will display. Read the License Terms and then click ‘Accept.’ Please see the below screen
Step – 3
Next screen ‘SQL server install location’ window will appear.
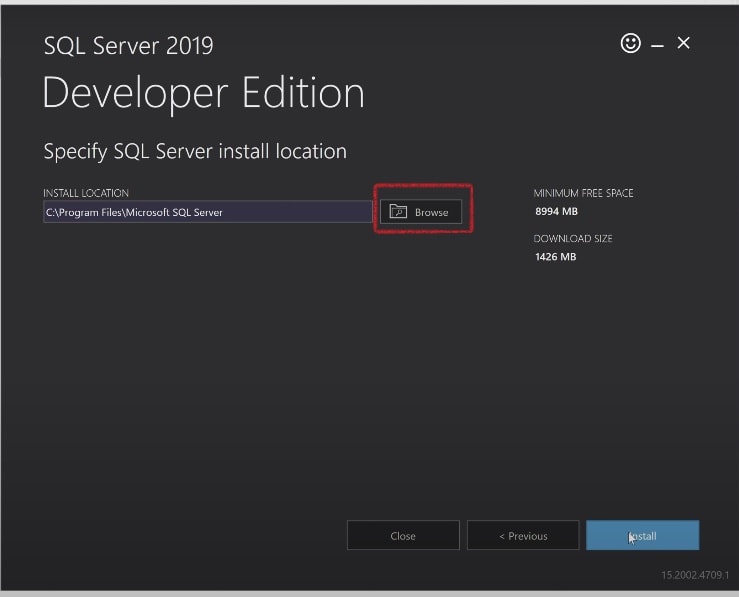
The Default location is C:\Program Files\Microsoft SQL Server.
If we want to change the installation location path, we can click on Browse. Once the location is selected, click the ‘Install’ button.
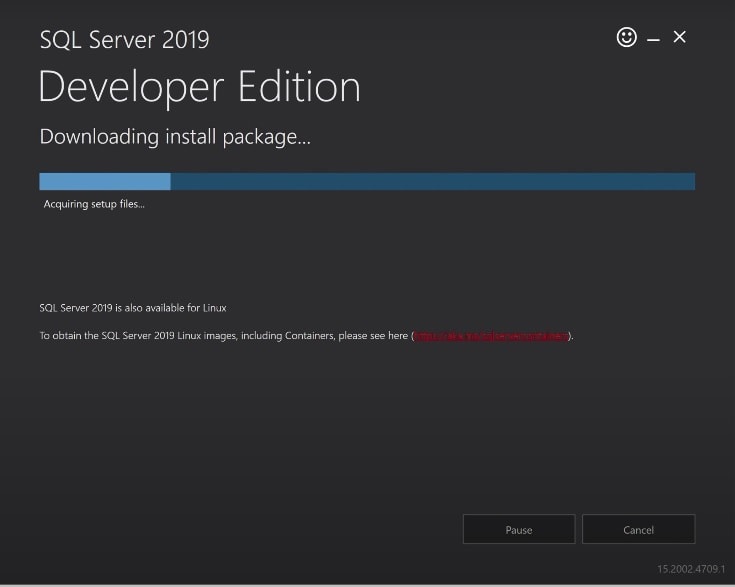
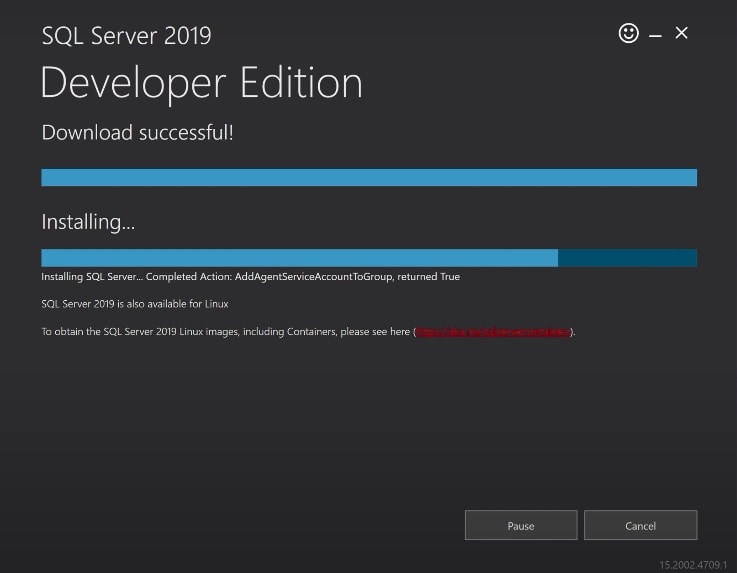
SQL Server package will download from online. ‘Downloading install package’ progress screen will be displayed. Wait till the download is complete. After this process, the system will start installing the developer edition. Please look into both screen will appear one by one
Step – 4
Once installation is completed successfully, the below screen will appear.
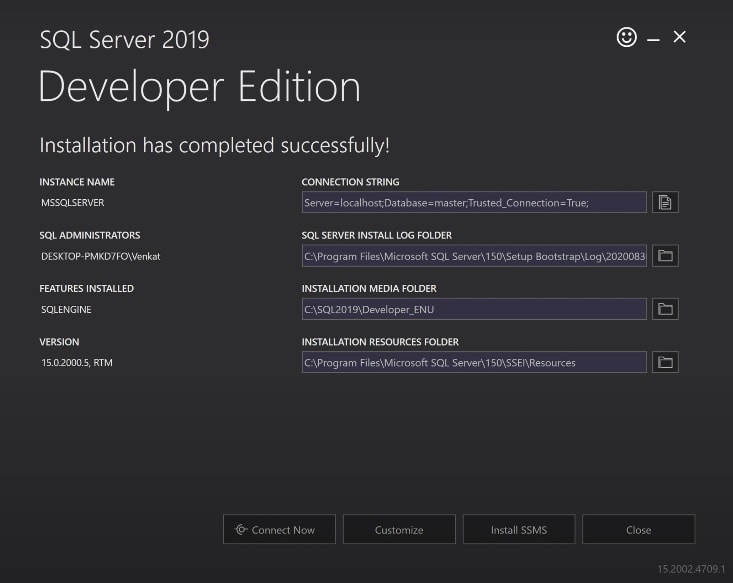
Connect Now: This will open a separate command line window for connection testing of what we have just installed. The system will run by default ‘select @@Version’ statement to confirm that we can connect to the new MSSQL SERVER instance successfully.
Customize: This will open the SQL Installation center to customize further and add feature other than which are there as a part of the BASIC installation.
Install SSMS: This is IDE that will take us to the Microsoft SSMS download link. We will cover SSMS in detail in our SSMS tutorial.
Close: This will close this window. The user is now ready to install SSMS IDE as instructed in the SSMS tutorial.
SQL Server Management Studio connection
Now we will discuss SQL server database connection from our system. SQL Server Management Studio (SSMS) is the principal tool for administering the Database Engine and writing Transact-SQL code.
Step – 1
Open your database engine.
Step – 2
Server Name define, which server is connected to SSMS.
Step -3
Authentication
Windows – It not required a user id and password
SQL Server – It required user id and password
Application Path:
Start –> All Programs –>Microsoft SQL Server–> SQL Server Management Studio
Please follow the below screenshots for your reference.

Importance of SQL Server
Pros
A good range of data types helps us store lots of diverse data
Easy administration helps us control who has access and what they can do with the data
Backup and restore processes are easy to manage and provide good security
Data can be easily replicated from Server to Server for use in other countries
Cons
The import/export process can be tricky to follow with lots of steps and could be better for importing flat files
Obtaining help from Microsoft is cumbersome and often other internet sources are better and quicker
The documentation is not great and again it’s generally better to obtain help elsewhere if needed